In this article, we will go through the step-by-step execution of some fundamental commands to work with Git and GitHub. In the last article, we have seen the installation and configuration of Git. How to make an account in GitHub and create your first repository in GitHub. Let's start with cloning the GitHub repository to local and pushing back the updates in the local repo to the GitHub repo.
Working with Git Repository
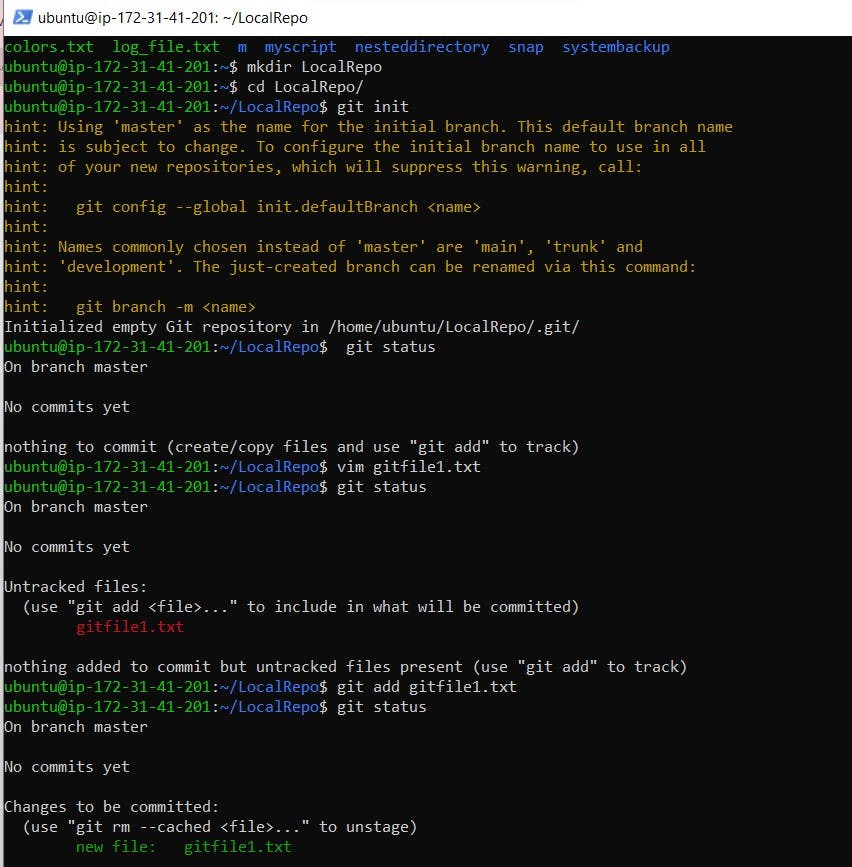
$ mkdir LocalRepo To create a new folder.
$cd LocalRepo/ Change the directory to LocalRepo.
$ git init Initialize LocalRepo as GitRepo.
$ vim gitfile1.txt Add as many files as you want in your local repo.
$ git status to check the status of the files.
Till now, the file is in the working area. To move the file into the staging area use the "add" command. Whereas moving the file from the staging area to the local repo use the "commit" command.
$ git add gitfile1.txt To add a particular file with name gitfile.txt.
$ git add . Using dot (.) at the end will add all the files present in the working area to the staging area.
$ git commit -m "write your message here" This commit will add files in the staging area to Local Repo.
To recognize the commits done by different users, it is very important to assign user_name and user_email.
$ git config --global user.name "type user_name"
$ git config --global user.email "type user_email"

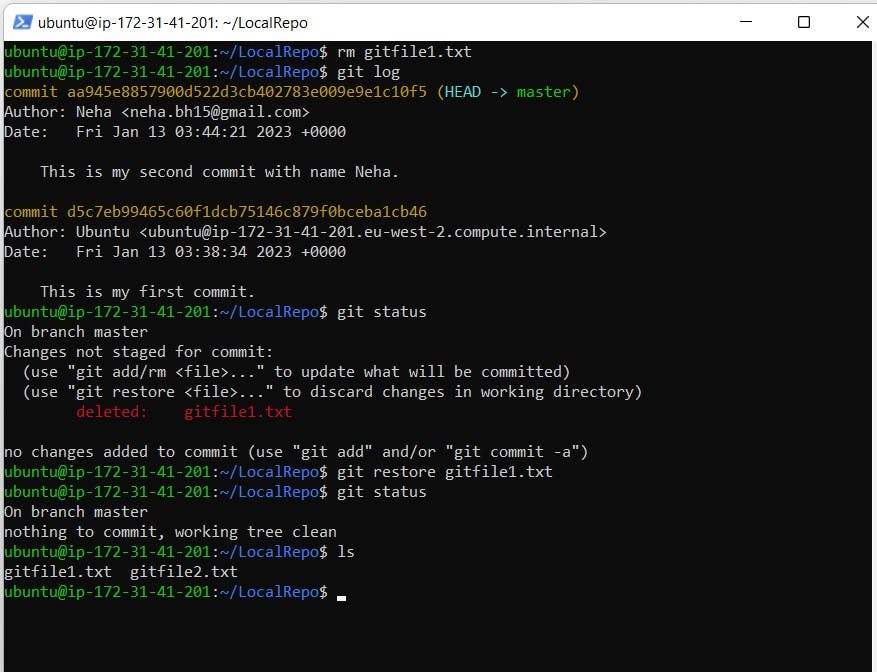
As Git is known as a version control system which means it keeps track of versions of the file created in it. To prove this, let's remove the file named gitfile1.txt and restore it. Generally, it is not possible in a normal directory that is not initialized as a git repository.
$ rm gitfile1.txt To remove the file.
$ git log To check who has committed the file deletion.
$ git restore gitfile1.txt To restore the file deleted.
Push and Pull from GitHub Repo
Go to your GitHub Repository and make a new repository. Here the repository DevOps_Batch2 is created on GitHub using GitHub account.
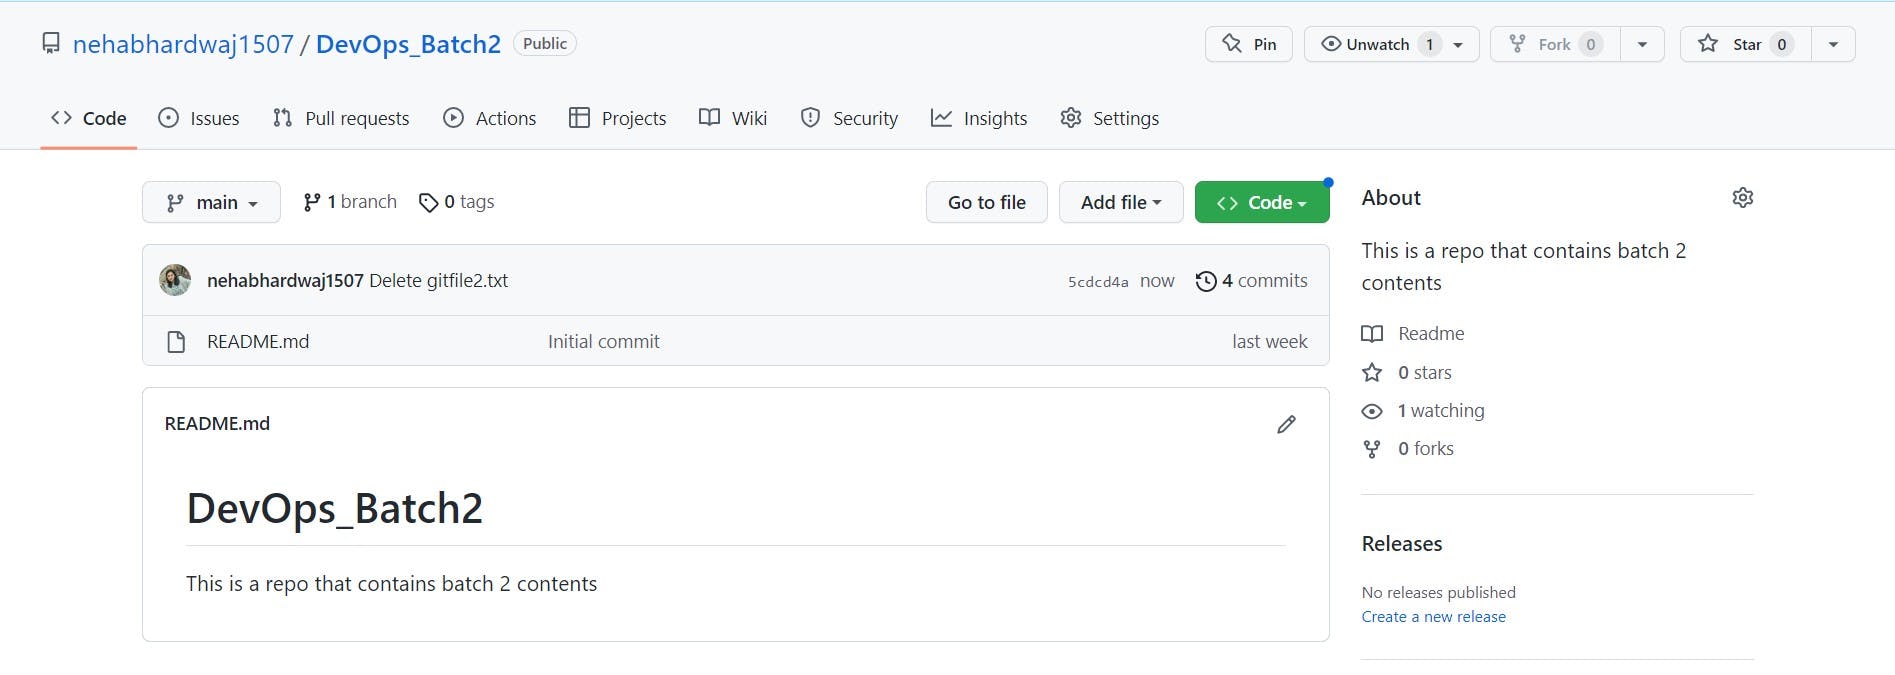
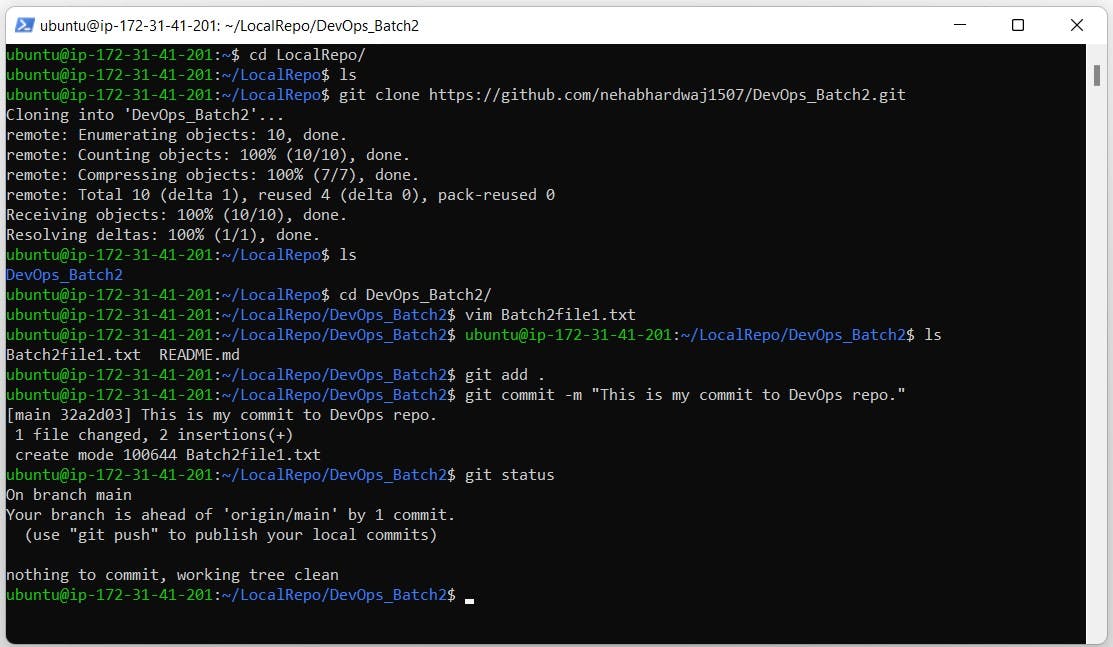
It can be seen that in the DevOps_Batch2 repository, there is only one README.md file. Let's clone the repository to the local system to add some files and push the changes back to the GitHub repo: DevOps_Batch2.
$ git clone <path of GitHub repo> To clone the GitHub: DevOps_Batch2 repo as a directory in the local repo.
$ cd Devops_Batch2/ Change the directory to the cloned repository.
Now, create some files and commit the changes. Here Batch2file1.txt is created.
To avoid password authentication, generate a token through the GitHub account and access the GitHub repository using that token. Make sure to copy the token generated to use in near future. To generate a token:
Go to Settings > Developer settings > Personal access token >
Token > Generate token
$ git remote set-url origin https://<token generated>@<github repo link> Access the GitHub repo by using the token generated.
$ git remote -v To check the origin.
$ git push origin main To push the changes from the local repository to the GitHub repository.

Now, check the updates in the GitHub repository. You will find new files added to it. Here we added Batch2file1.txt in the GitHub repository.

Hope you find this article interesting and helpful. Do follow and subscribe for more such articles on DevOps tools. Thanks for reading. -Neha Bhardwaj
