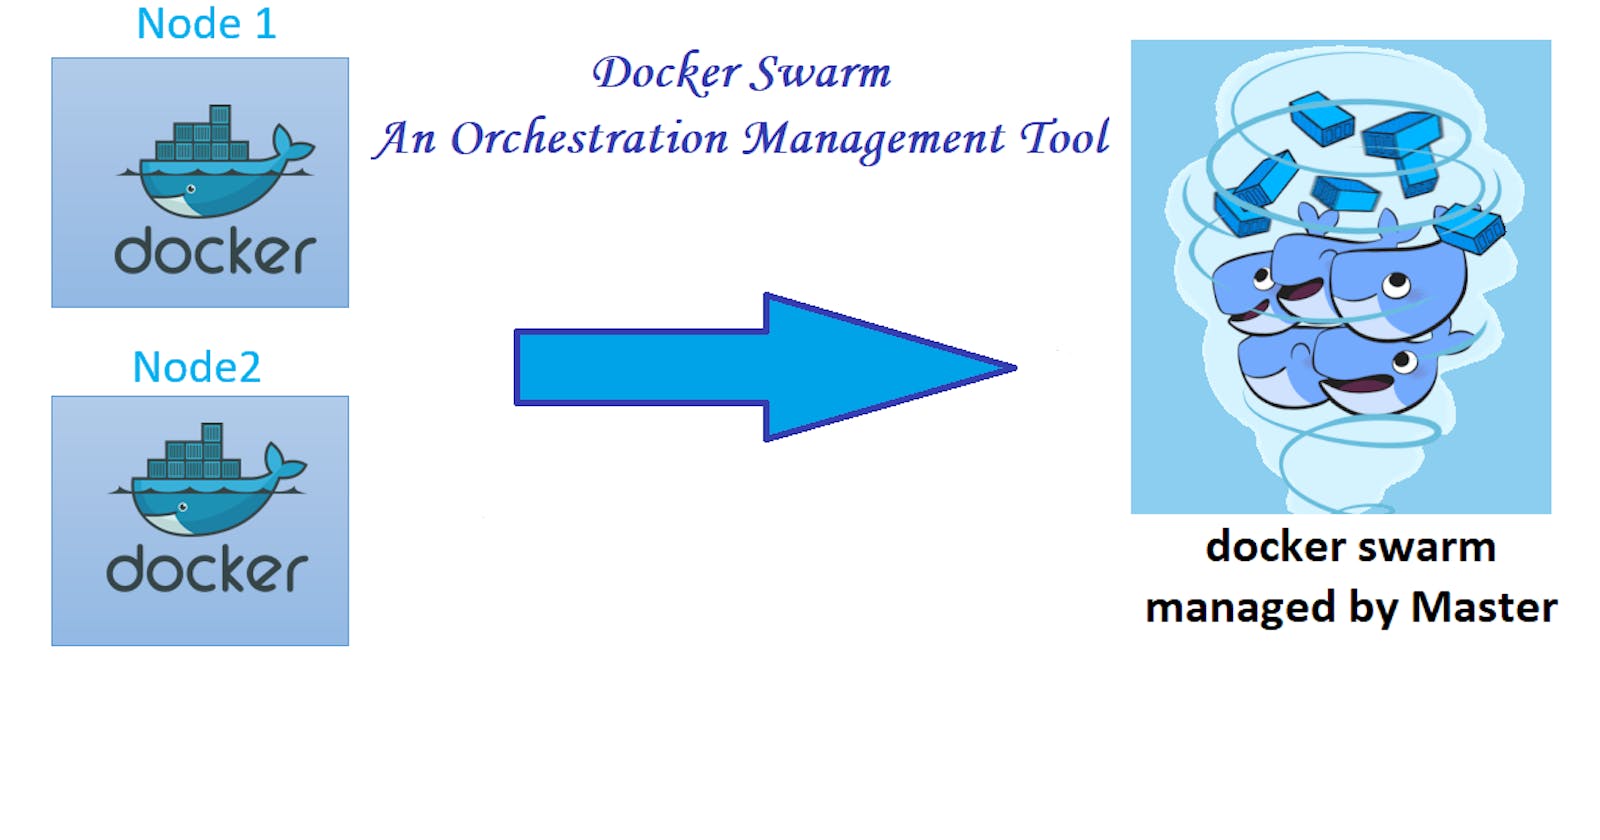
Docker Swarm is a combination of two words: Docker + Swarm; which means it is a group of servers used to run docker applications. These servers can run multiple containers and replicate themselves as per the requirements. As we studied in the previous blog, a group of containers can be run through docker-composition too. Then what is the difference between docker-compose and docker-swam?
Docker compose is a build tool that uses a YAML file of configuration to run multi-container docker applications over a single docker engine with just one command. But what if you want to run multiple docker engines collectively to run a service? To do so, you need to adopt swarm mode. The main problem faced while using docker-compose was managing these containers in case any of them gets down. To overcome this issue, docker swarm comes into play. Docker swarm is an orchestration tool that also uses YAML files to run over multiple docker engines. Hence, a docker swarm is a cluster of docker nodes that offer all the required resources to start multiple containers over them. The cluster consists of two types of nodes:
Master node: The server that not only runs the containers over it but also manages the other servers or nodes that work as a worker under it.
Worker node: A server that runs the containers and services assigned by the master node.
Task: A task carries one or more docker containers and runs the command inside them.
Service: A service can be defined as the application for which one wants to run the containers. For example Nodejs applications, Java applications etc.
One more difference between compose and swarm can be seen in the network that they form. Docker-compose forms a network where multiple containers managed by a single docker engine, communicate with each other called a bridge network. Whereas, the docker swarm forms a network that is the same as the bridge network but spans multiple docker engines called an overlay network.
Moreover, the docker swarm can replicate the containers based on their requirements. Let's start hands-on with the docker swarm.
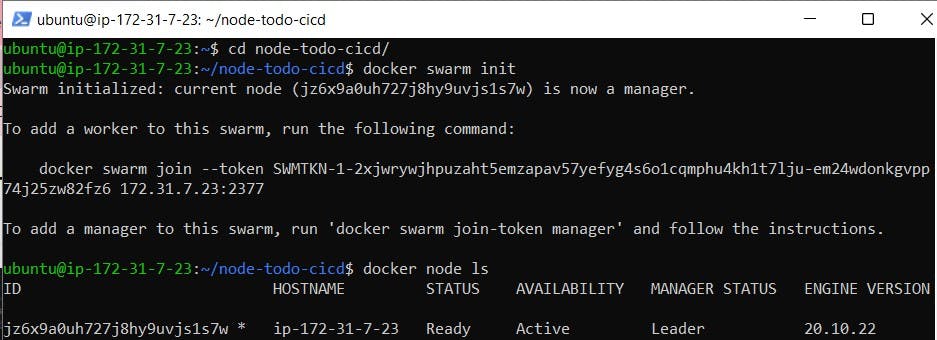
Step 1: To initialize the swarm mode of a server, run the following commands over it.
$ docker swarm init Initialize the docker server in swarm mode.
As a result, you will find the node ready as a Leader.
$ docker node ls To get the list of active nodes.
$ sudo docker info To get detailed information about the current node.


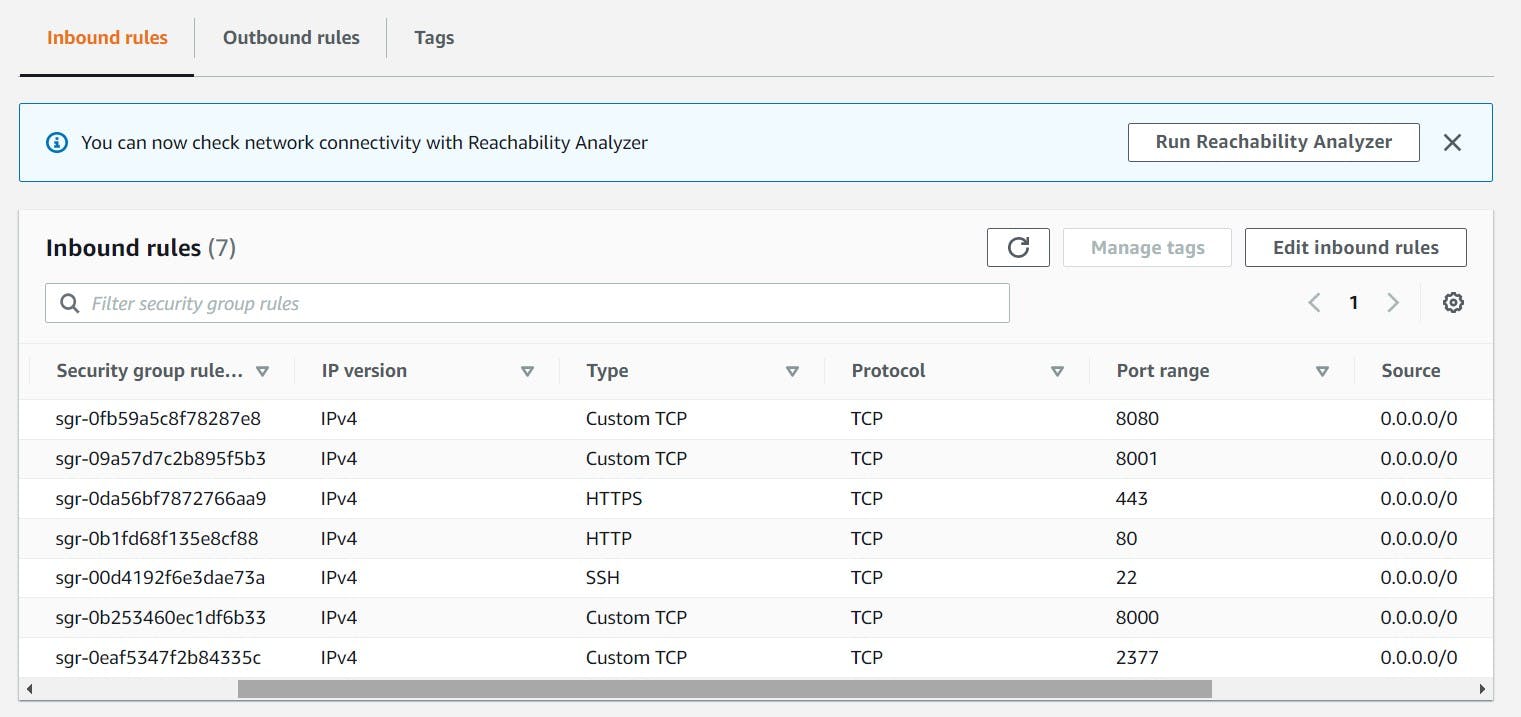
Step 2: As per the information, the node is running on the Port: 2377. So, the same port should be open on the server. Open the port as an inbound rule of the security group on the server.
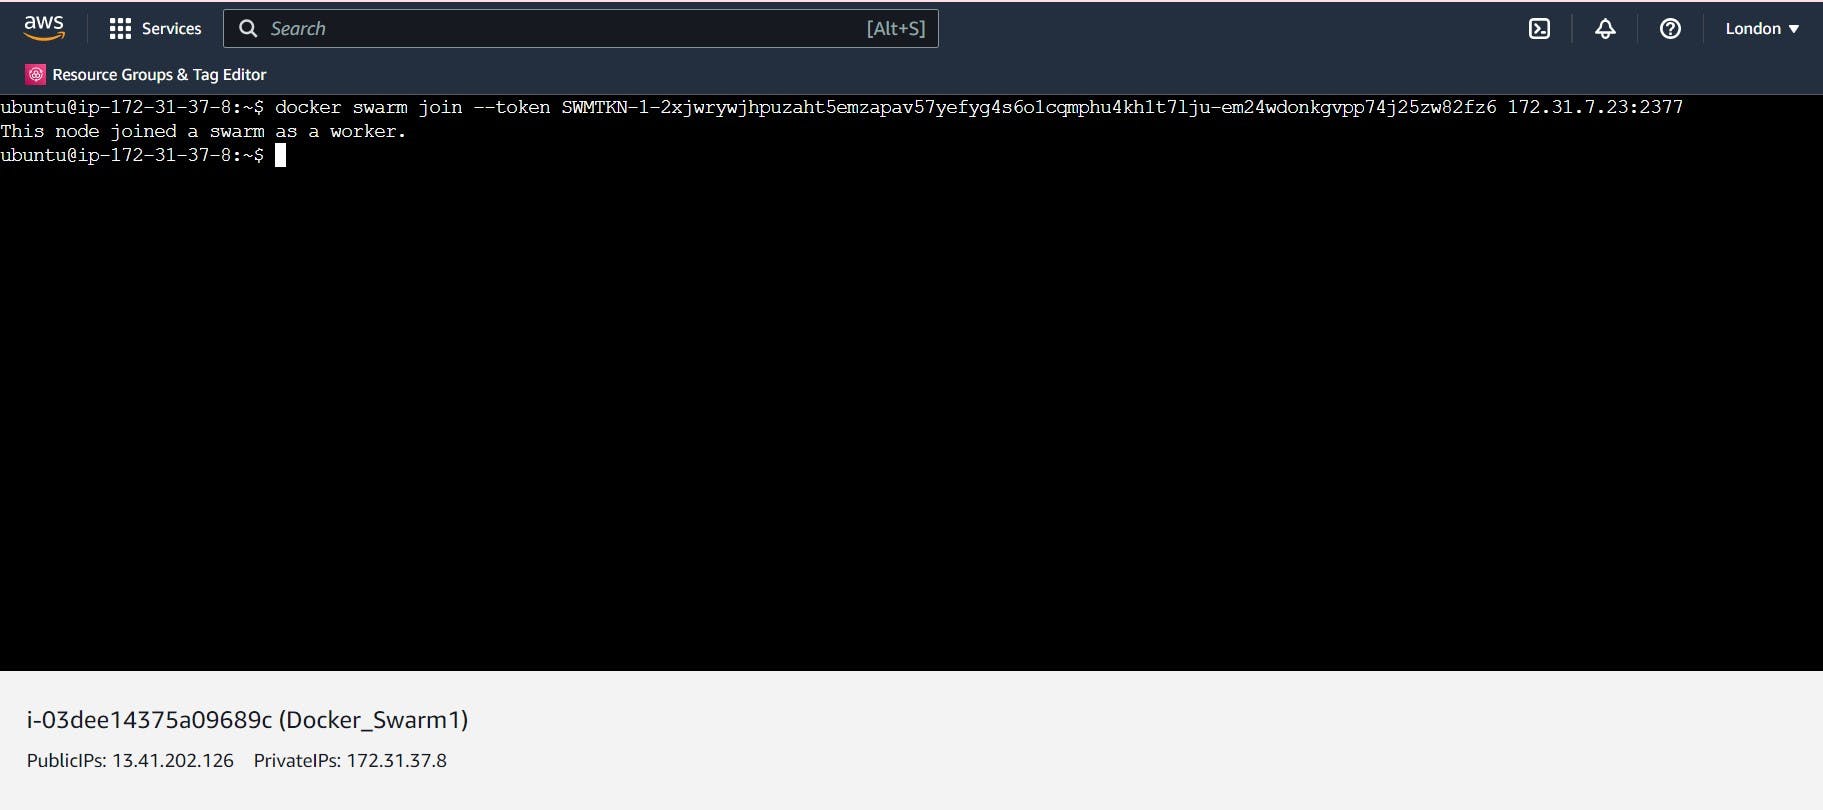
Step 3: To add nodes as a worker under the docker master, release a token through the master node and then run the same token over another three nodes that you want to run as a worker node. After initializing worker nodes, you will find them actively working under the master node.

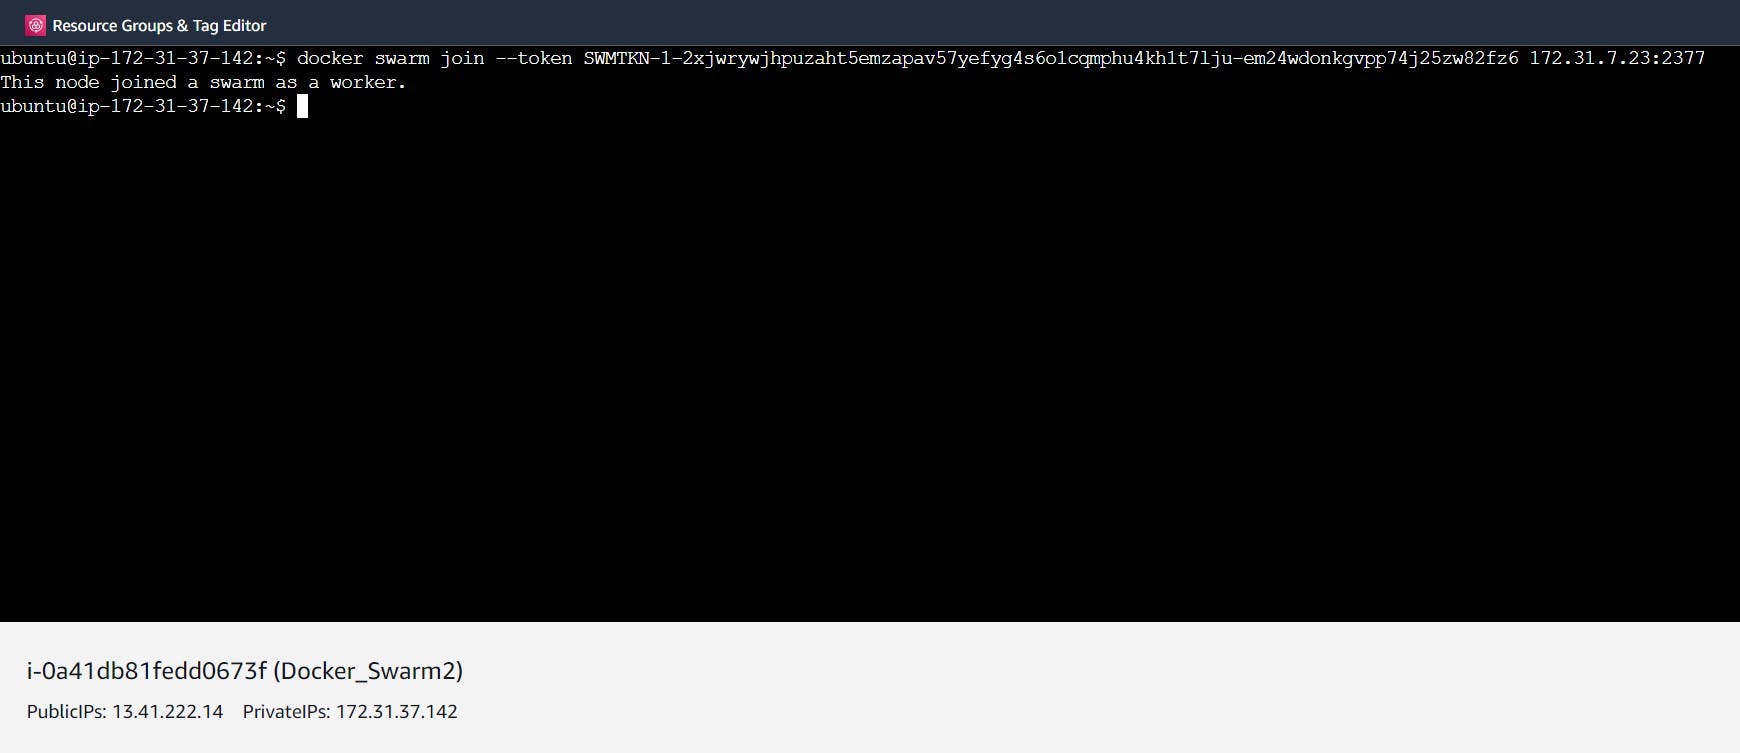


Step 4: Let's create a docker service to replicate the no. of tasks by 4 using the service command as shown below.
$ docker service ls List all the services.
$ docker service rm <service_id> To remove a particular service whose id is provided.
$ sudo docker service create --name <name_of_the_service> --replicas <number> --publish <port_mapping> <docker_hub_repo/image> To generate replicas of the docker image.
Note: All the ports necessary to run a particular application should be open on the server for mapping. The master swarm will manage these replicas to run over the worker nodes that satisfy the requirements to run the containers.

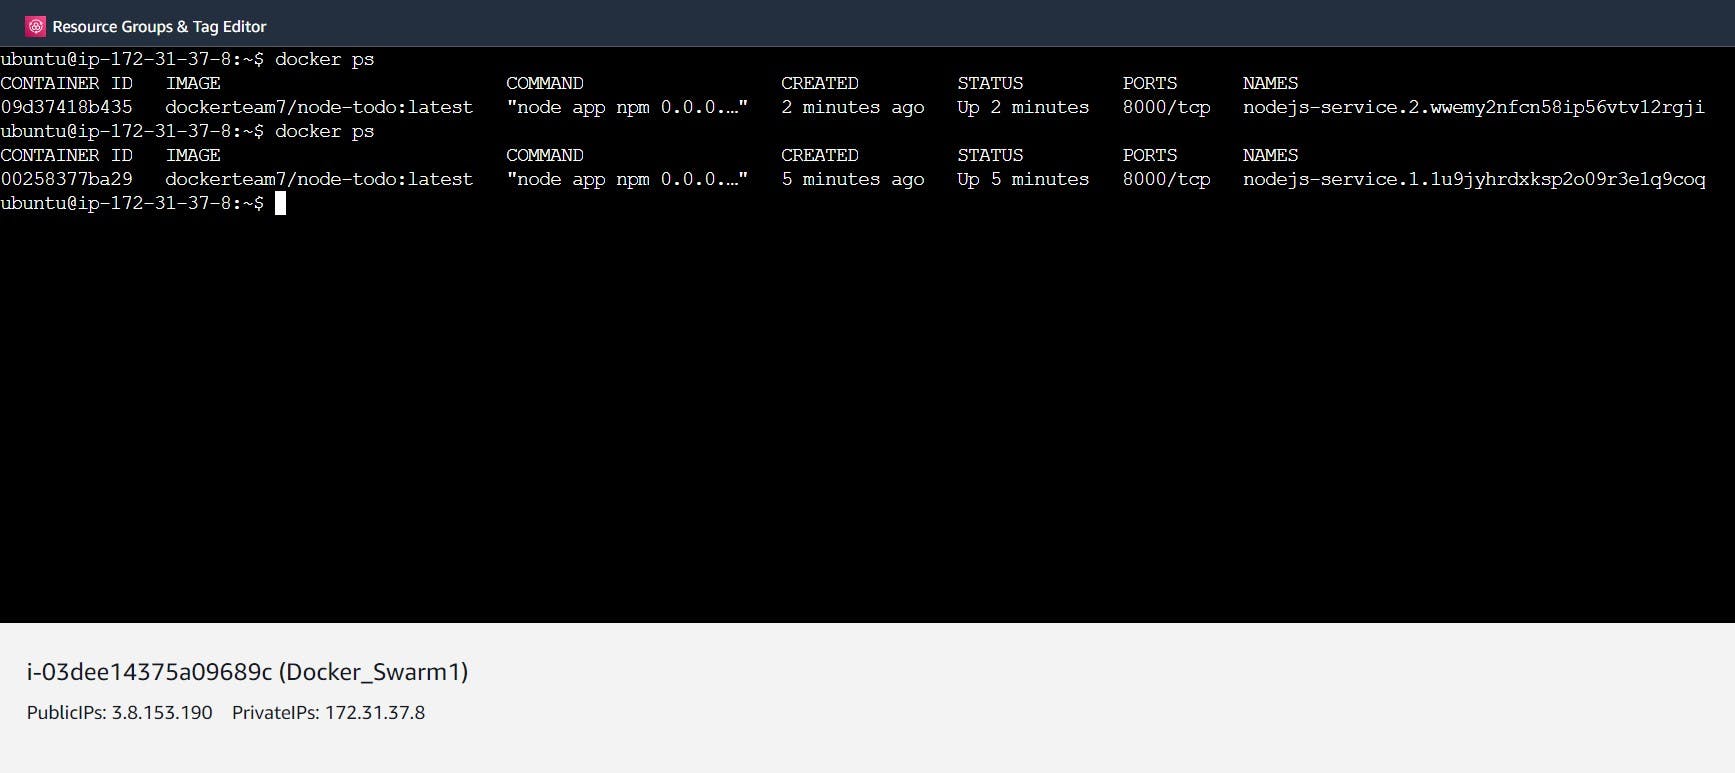

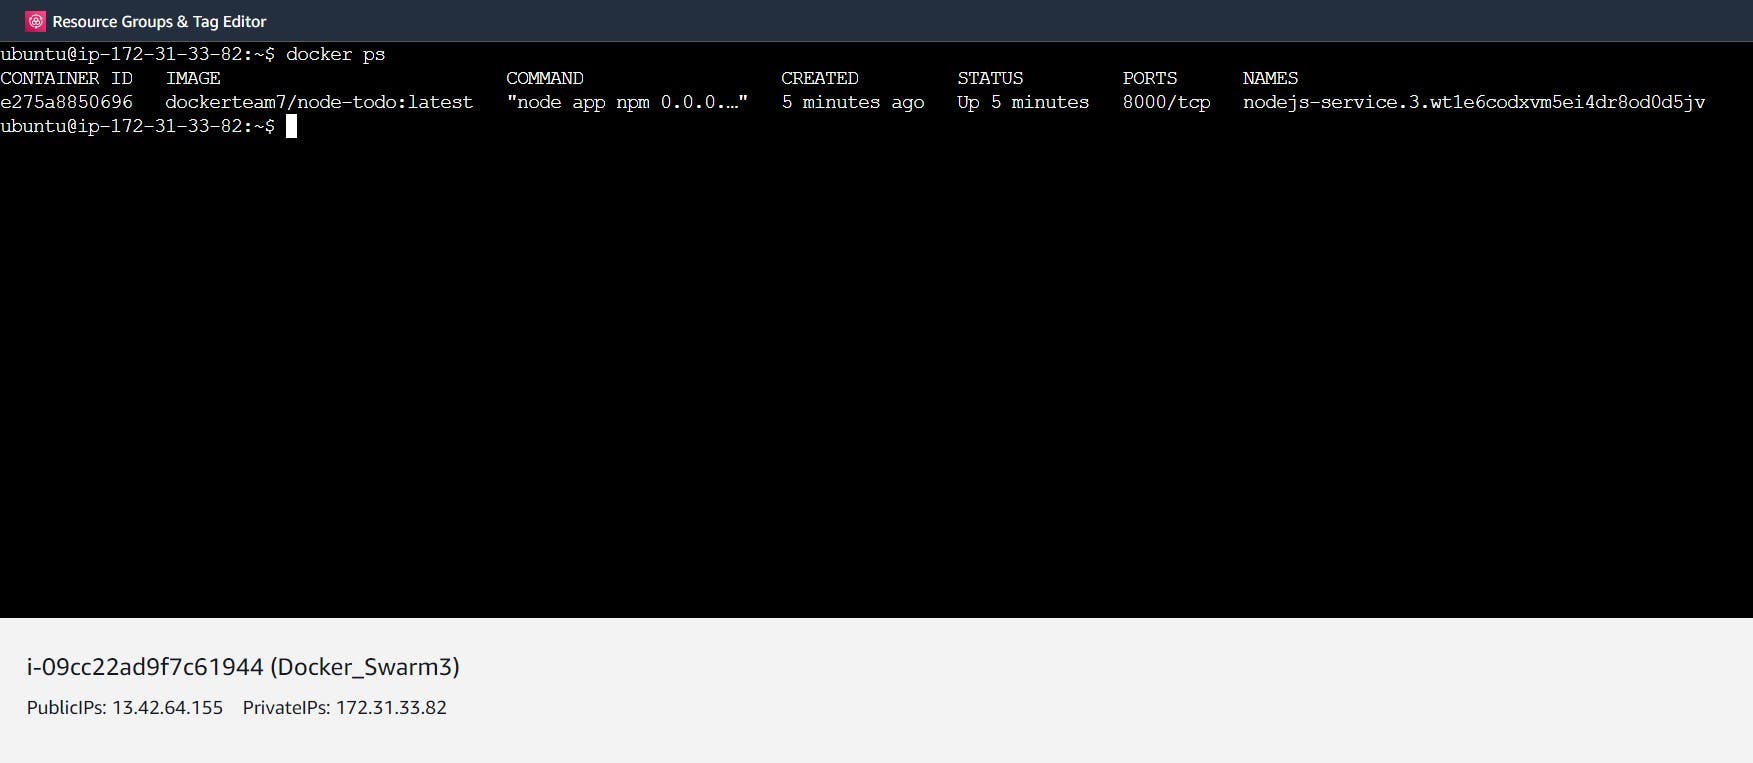
Step 5: To run the graphical interface of the application, copy the public id of any of the servers on which that application's container is running and map it with the port 8000. You will find the application interface running over the server.


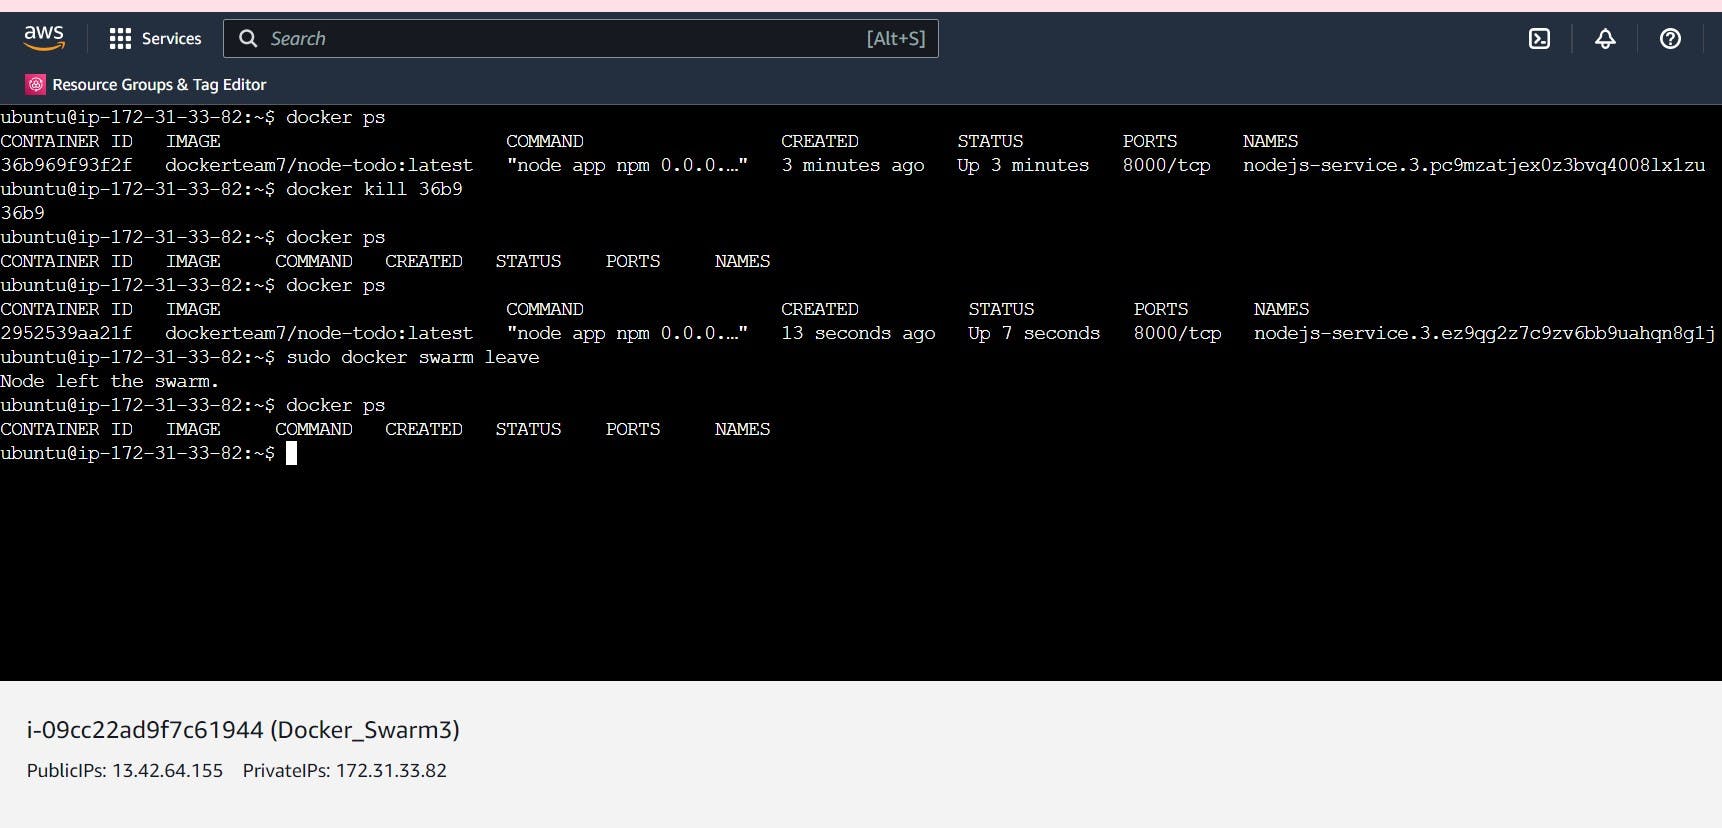
Step 6: A container running on the worker node that is killed by the user will be automatically recovered when required by the master node. To show this, let's kill the container running over worker node 3.
$ docker kill <cont_id>
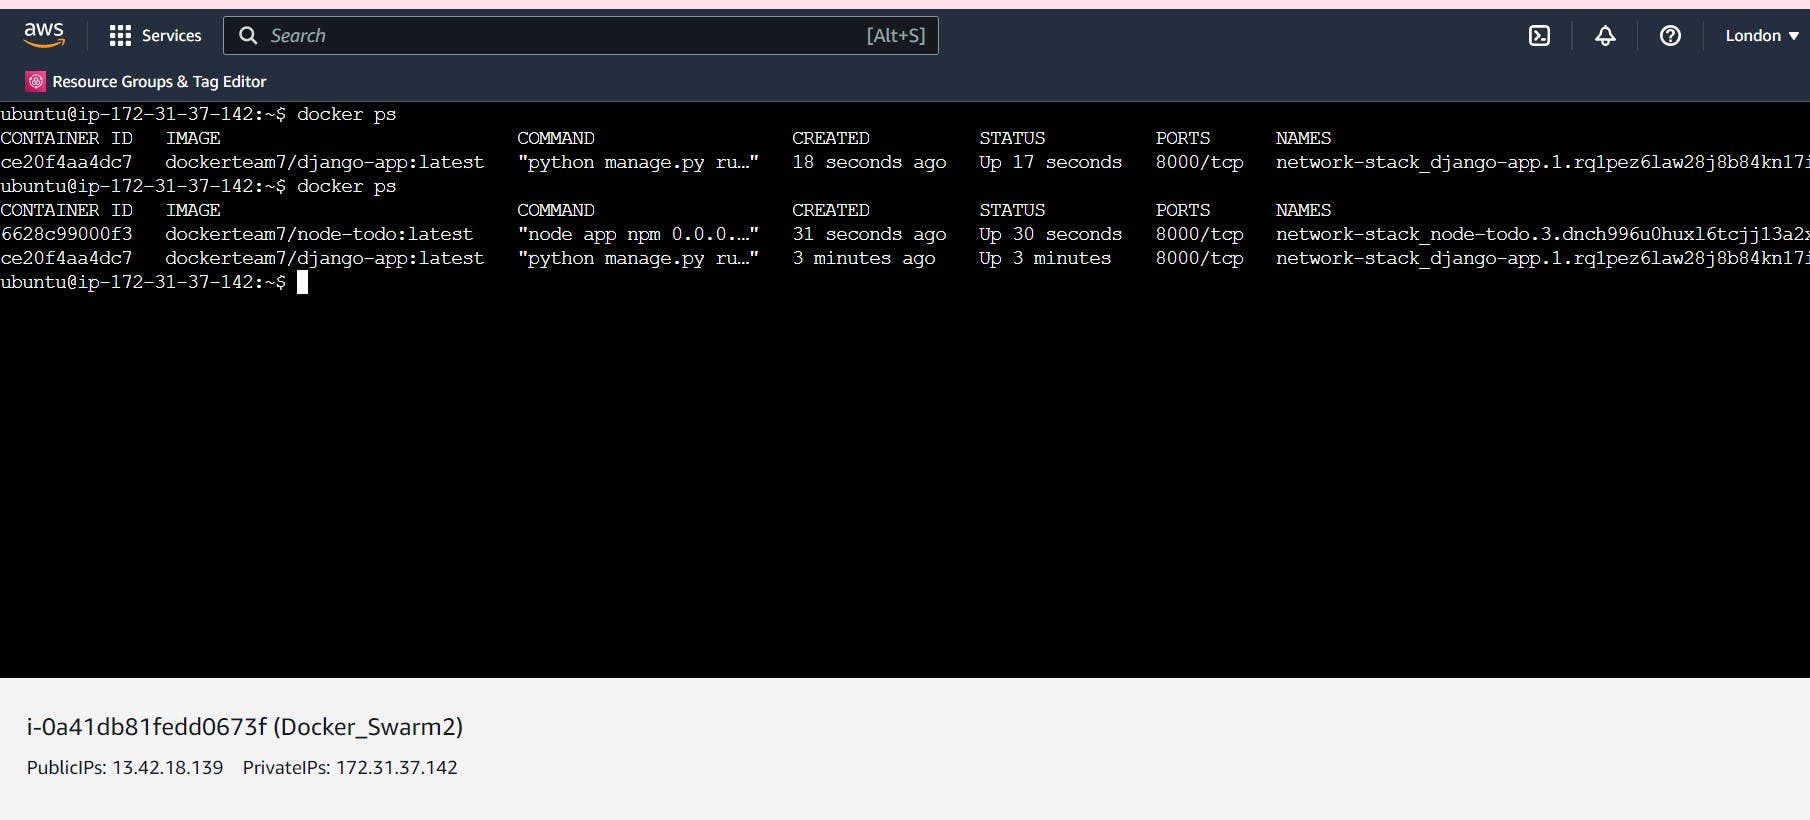
Check the running containers again on worker node 3, you will find the same process running with a new container id. Hence, it has been recovered by the master node.
Note: A node can either be removed from the worker list or it can leave the swarm itself depending on the circumstances as shown below. Once the worker node left the swarm, it will no longer be authorized to use the data that was saved while working as a worker node. To make it a worker again under the master node, use the same token generated by the docker swarm. For example, here node 3 has left the master node and as a result, it failed to reach the website.

Understanding Stack Deployment under Docker Swarm
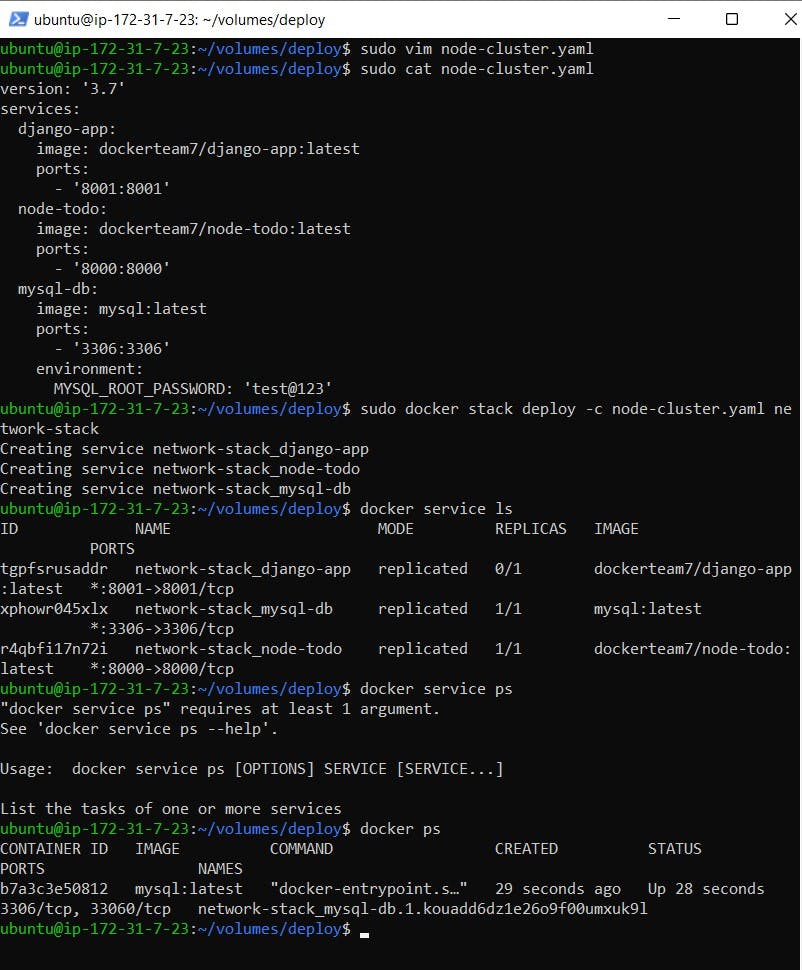
Step 7: Now, we will understand how to run multiple services in just one go. To deploy such services, there is a configuration file that is known as a deployment file. This is a YAML file having an extension .yaml. The deployment file written below will run the services Django app, Nodejs app and MySQL database under one configuration file only. These services are arranged under the docker swarm known as the docker stack. Now, deploy the stack using the command:
$ sudo docker stack deploy -c <yaml_file> <stack_name>
As a result, 3 services will be created on a single container as shown below.
Step 8: To replicate the service use the service scale command below:
$ docker service scale <stack_name>=<no._of_replicas>

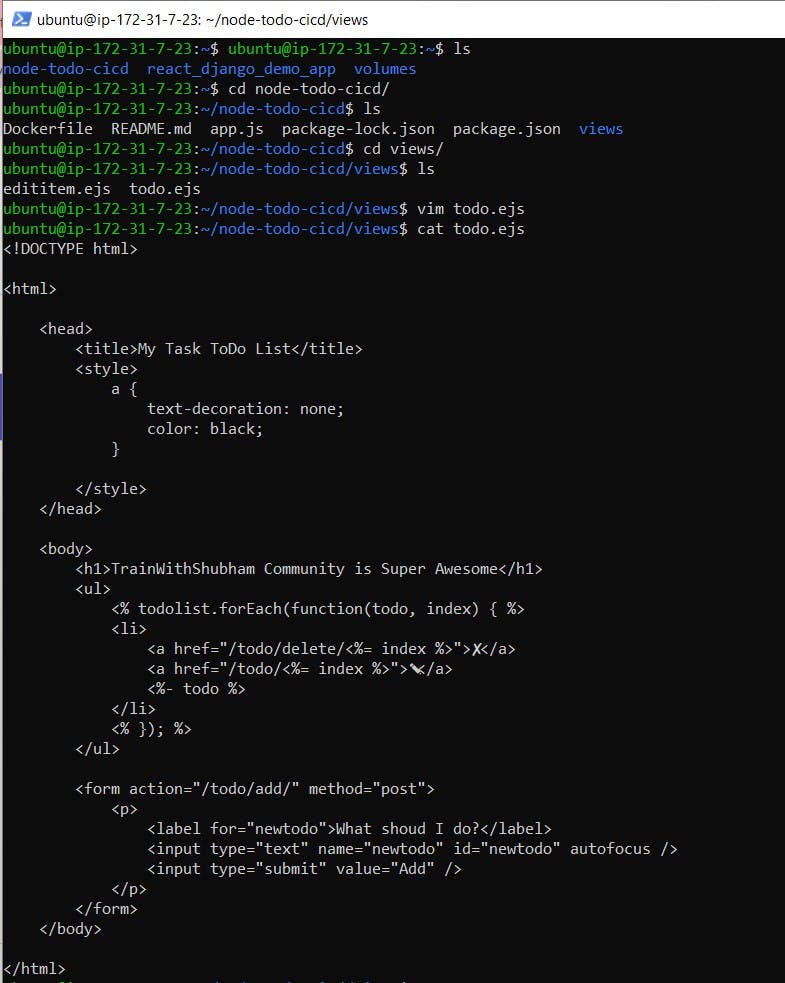
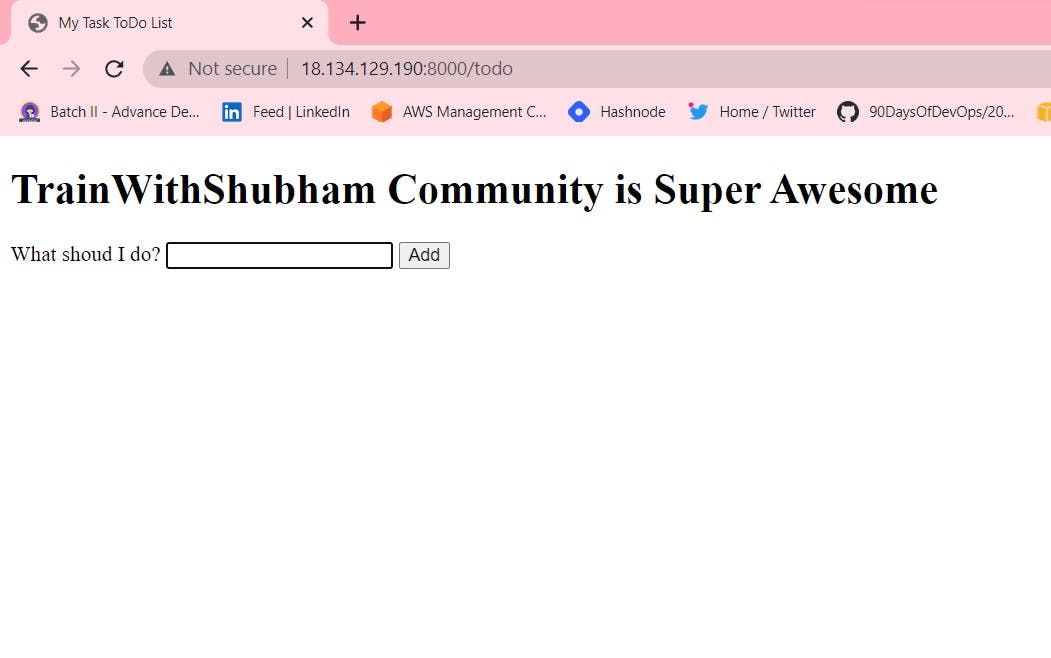
Step 9: To see how updation in the application works while running a service, update the title of the webpage of nodejs application to "My Task ToDo List".
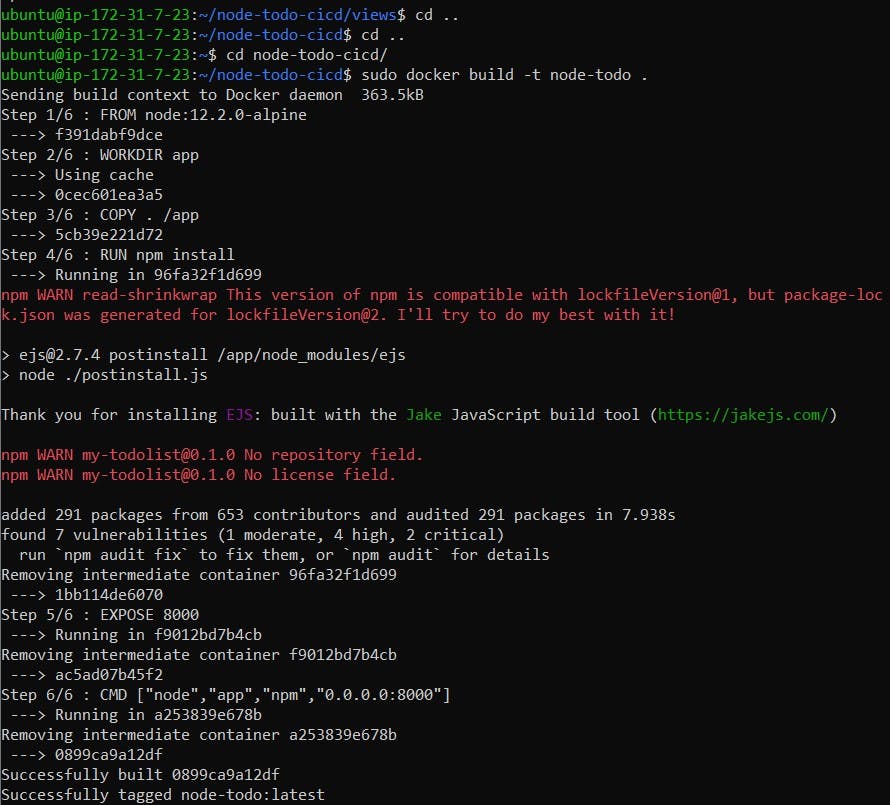
Now, build the image again to update the latest code.
$ sudo docker build -t <image>.
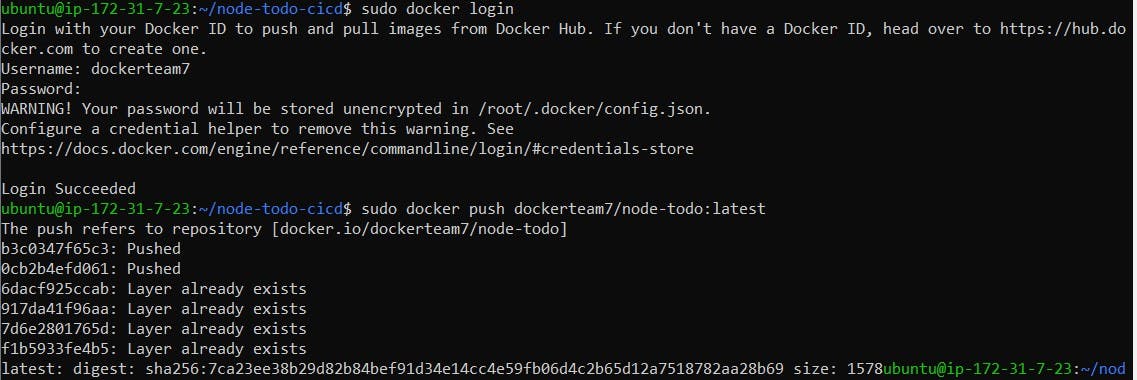
Push the updated image to the Docker hub.
$ sudo docker push <docker_hub_image:tag>
Step 10: Update the service using the command
$ sudo docker service update --image <docker_hub_image:tag> <updated_service_name>
As a result, you will find the title updated on the webpage.

All done for the docker swarm. Thanks for reading the blog. Stay Tuned. Hope you find it interesting and informative. Will upload the next blog on Jenkins. Happy Learning :)- Neha Bhardwaj
