Docker Volume & Docker Compose
DevOps Blog: 7

In this blog, you will get to know about:
What is docker volume? Advantages of using it.
How to initialize a directory as a docker volume?
How to mount the docker volume with Containers?
What is docker-compose and the significance of using it?
How to create a docker-compose.yaml file?
The working of docker-compose up and down.
Docker Volume
As we know during containerization, the docker image is converted into containers. These containers store code as well as dependencies of the application used. Each application has its data that is stored within the container only. So, the container also contains the data of the application for which it is running. Now, think about the scenario if we delete the container, where does that data go? The answer is the data will be lost. Oh! But we need that data to be used further. Is there any other way to persist that data outside the container? Yes, It can be done with the help of volume.
Docker Volume is the mechanism to persist or save the data generated and used by the docker container. The data is saved outside the container to be used in the future or shared with other containers. In case, a user kills the container that is no longer in use, its data can be saved in volume. Hence, volume is an essential component while working with docker containers. The volumes can be shared among different containers.
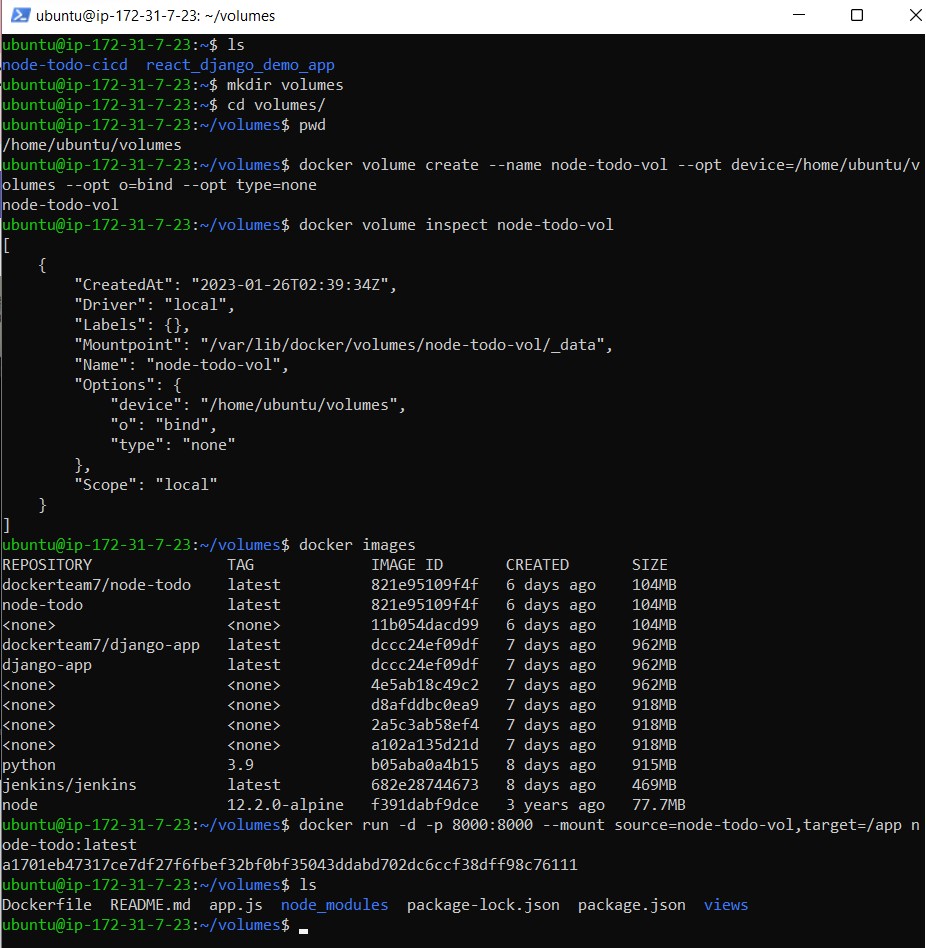
To create a volume, first, make a new directory that you want to initialize as a docker volume to save the container's data. Now, create a docker volume using the docker volume create command and link it with the directory you created earlier by using its path as the device volume as shown below:
$ docker volume create --name <name_of_the_docker_volume> --opt device=<path_of_the_device_volume> --opt o=bind type=none
As a result, a docker volume will be created. You can inspect the volume to get information about the volume created.
$ docker volume inspect <docker_volume>
After creating the volume, it's time to mount it with the container to get its data saved in the volume.
$ docker run -d -p 8000:8000 --mount source=<docker_volume>,target=<working_directory> <image:latest>
As a result, the data inside the container will be saved in the device volume.
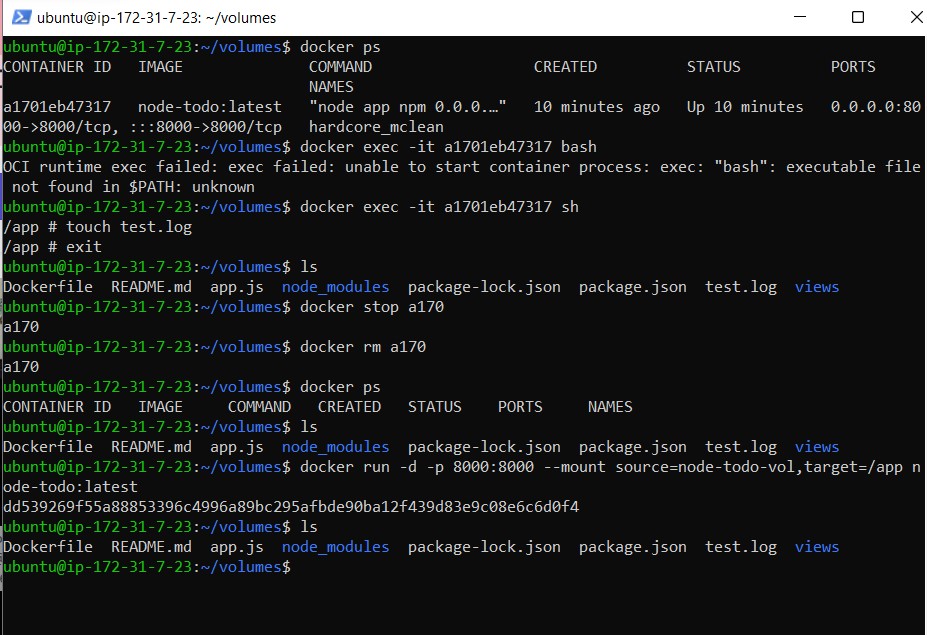
Creating a file inside the container
To explore more about the docker volume, create a file inside the docker container and exit. The command below will take you inside the container and you can interact with the container using a shell (sh or bash etc.).
$ docker exec -it <container_id> <shell>
Now, go to the device volume. The file you created inside the container will appear in the device volume too. What if you remove the container? Only the container will be deleted not the volume. The volume will remain as it is.
$ docker stop <container_id>
$ docker rm <container_id>
Note: To delete a container, it should be stopped first.
Moreover, the same volume with all the files in it can be mounted to a new container as shown in the screenshot below.
Docker Compose or Docker Network
Think about a tool that can provide you service to build images and run multiple containers with just one command. You don't need to run multiple commands to start, stop or remove containers. Is this sound great? Such a tool is known as Docker Compose.
Docker compose is a tool that is used to define and work with multiple containers running multiple containers. This tool should be installed first in your docker engine and then only a yaml file can be created to define services. With a single command, the services can be turned up or down using yaml file. Docker Compose is a network of docker containers that make bridges to communicate with each other hence known as Docker Network.
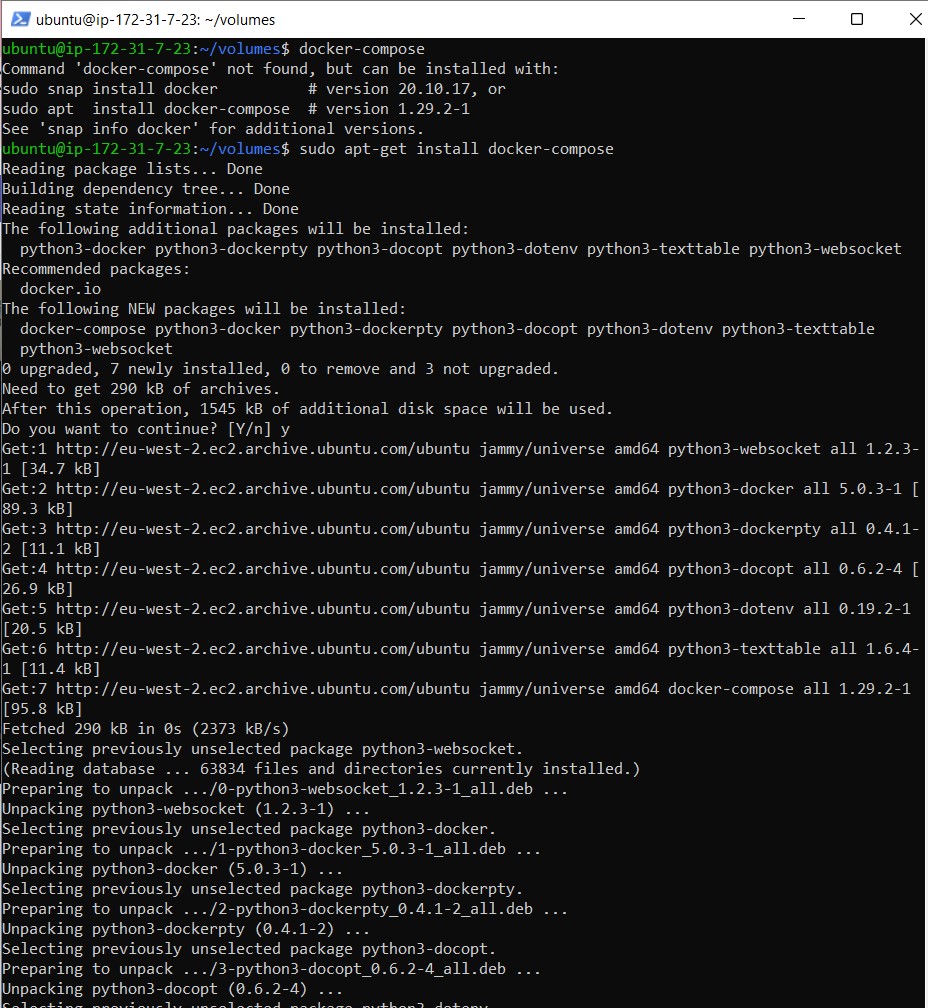
$ docker-compose
To check whether 'docker-compose' is already installed or not?
$ sudo apt-get install docker-compose
To install 'docker-compose' on 'docker-engine'.
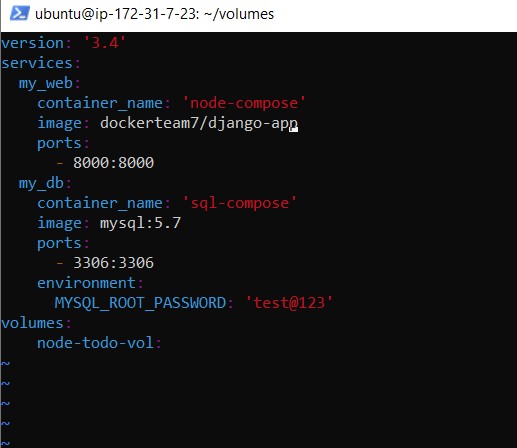
The docker-compose.yaml file consists of two services to run two containers; one is of 'nodejs' and another of 'MySQL' and the docker volume will be attached to these containers. This is to note that it is necessary to give a password while creating a container of database (SQL).
After creating 'docker-compose.yaml' file, the services are ready to start. To start the services use the following command.
$ docker-compose up

Note: The ports defined in the yaml file should be open at the inbound rule of the security group of the ec2 instance on which the application is running.
Now copy the public id of the ec2 instance and map it to port 8000. You will find your database running for the nodejs application as shown below.

You can turn off the services running through docker-compose by using the following command. Here services denote the containers running through yaml file.
$ sudo docker-compose down
In the same way, you can turn docker-compose up or down depending on your need.

Important to note down:

Note: Turning down the docker-compose will stop the running of containers. If this command will run again, it will only give a warning as there is no such running service. On the other hand, if you run the docker stop command to stop a container that is already stopped, it will return an error. An error usually interrupts the working of the pipeline whereas, a warning does not affect the pipeline.
All done for the docker containers. Thanks for reading the blog. Stay Tuned. Hope you find it interesting and informative. Will upload the next blog on Docker swarm. Happy Learning :)- Neha Bhardwaj


